


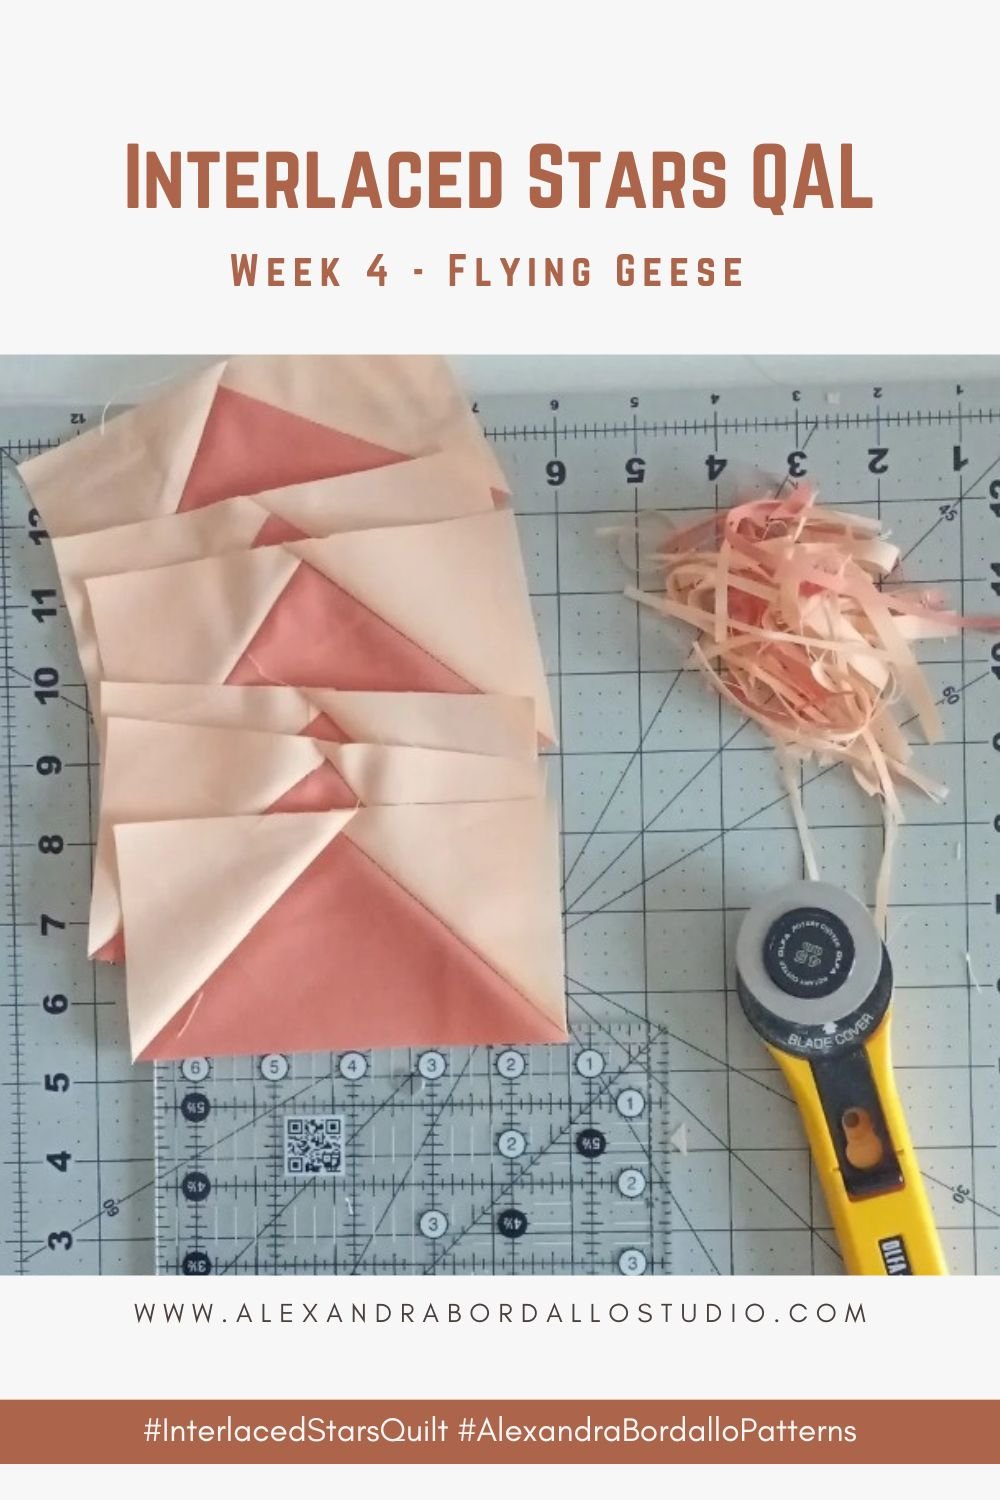
Welcome to week 4 of the Interlaced Stars quilt sew along! I love this week because we are sewing Flying Geese using the 4-at-a-time method. If you have been here for a while, you know that I love those flying geese and they are the main blocks of one of my favorite quilt patterns, the Dancing Geese quilt.
Interlaced Stars Quilt Along Schedule
- Week 1 (Jan 15th to Jan 21st): Fabric & Cutting
- Week 2 (Jan 22nd to Jan 28th): Square-in-a-Square center blocks
- Week 3 (Jan 29th to Feb 4th): 8-at-a-time Half Square Triangles blocks
- Week 4 (Feb 5th to Feb 11th): 4-at-a-time Flying Geese blocks
- Week 5 (Feb 12th to Feb 18th): Sewing Starlight and Astros Blocks
- Week 6 (Feb 19th to Feb 25th): Quilt Top Assembly & Quilting Ideas
Share Your Progress - Join the conversation!
Ask questions and connect with fellow quilters using our official hashtag: #InterlacedStarsQuilt
You can also join our private Facebook group to connect with fellow quilters and Interlaced Star Makers. CLICK HERE TO JOIN and let us know you're a Interlaced Star Friend!
4-at-a-time Flying Geese Formula
There is a formula to know the sizes fot the large square (goose fabric) and the four small squares (sky fabric). To calculate those sizes you need to know first the finished width and height of your FG units.
No trimming and scant 1/4 inch seam: cut 1 large square (goose fabric) finished width + 1 1/4" and cut 4 small squares (sky fabric) finished height + 7/8".
More trimming space: cut 1 large square (goose fabric) equal to the finished width + 1 1/2" and cut 4 small squares (sky fabric) equal to the finished height + 1".
In the PDF pattern I indicate what are the sizes of each of the squares to make the 4-at-a-time flying geese for the Interlaced Stars quilt.
How To Trim Flying Geese Units
I like to make my Flying Geese units slighty larger than needed and trim them to size. I have found this to be the best way for me to trim FG units.
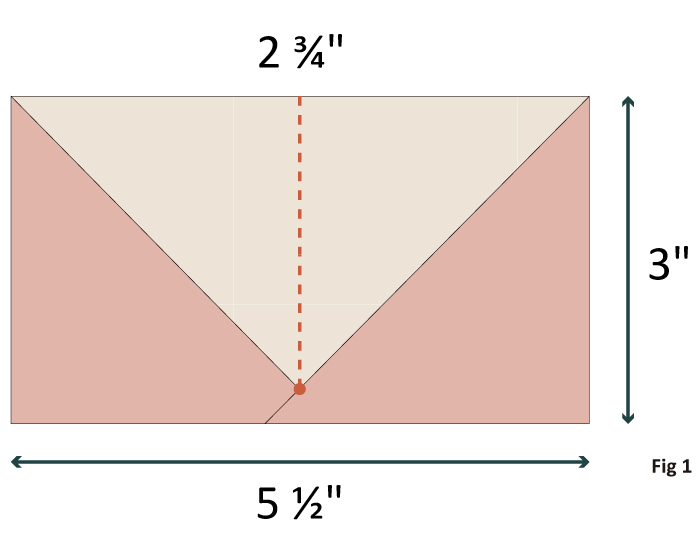
In this tutorial I'll show you how to trim a 3" x 5 1/2" Flying Geese block (unfinished size) using a 6 1/2" square quilting ruler.
WHAT DO YOU NEED:
- A rotary cutter
- A cutting mat.
- A ruler that is at least the width of the unfinished unit and has a diagonal line.
First, you need to figure out where the V center point of your Flying Geese is, marked with a red dot (Fig 1). To calculate the center of your block you'll have to divide the widht by two; in this example, 5 1/2" divided by two is 2 3/4".
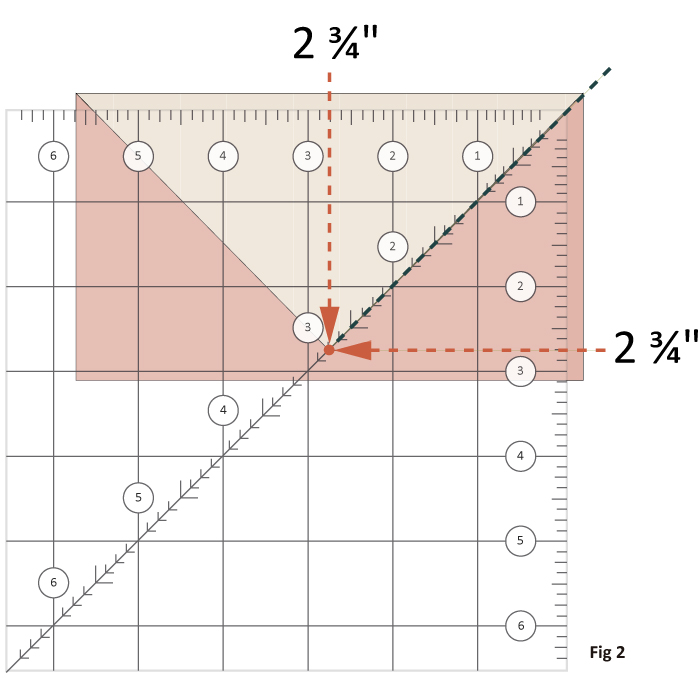
Line up the diagonal line on the ruler right along the diagonal line of the flying geese - marked below with a black dashed line (Fig 2). Make sure the 2 3/4" point on the diagonal line is on top of the V midpoint of the Flying Geese marked with a red dot.
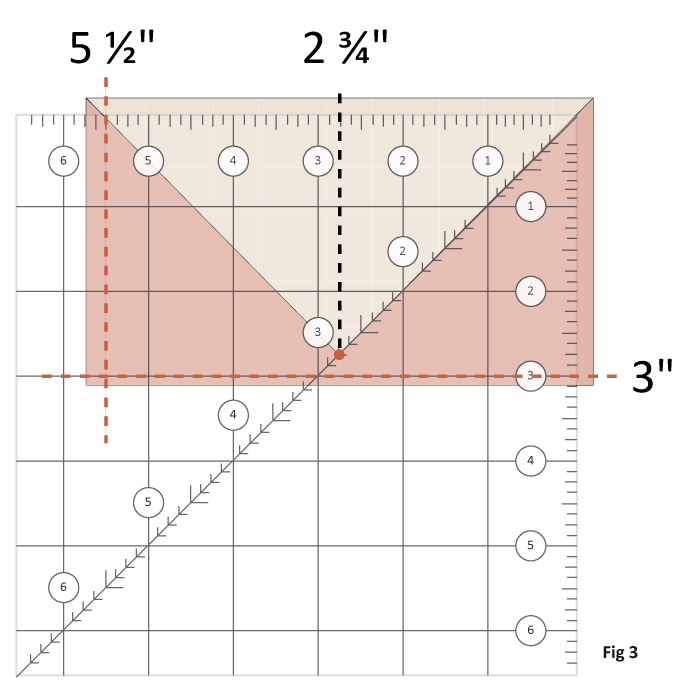
You need to check that the unit fits inside the 5 1/2" by 3" intersection marks on your ruler, marked with red dashed lines (Fig 3).
With the rotary cutter, you are going to make the first two cuts. Trim the right side (following the direction of the arrow) and then trim the top of the unit (Fig 4). You have two sides of the Flying Geese cut.
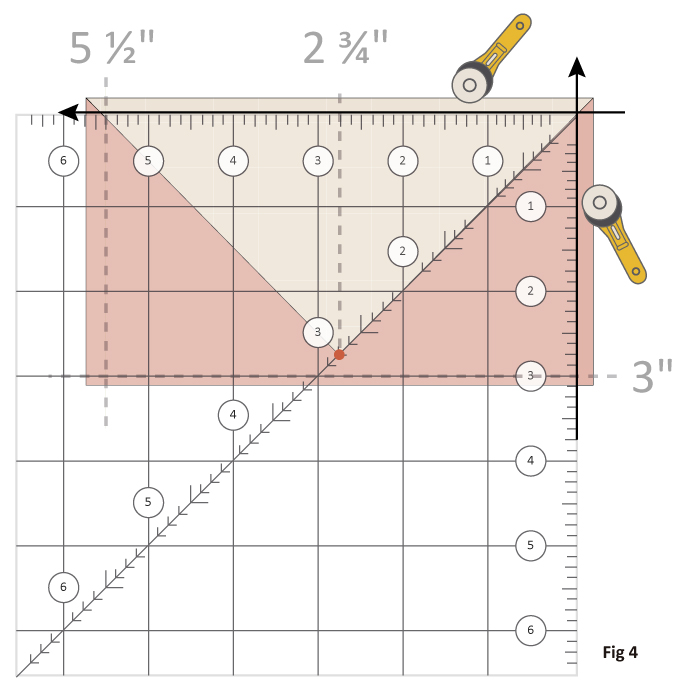
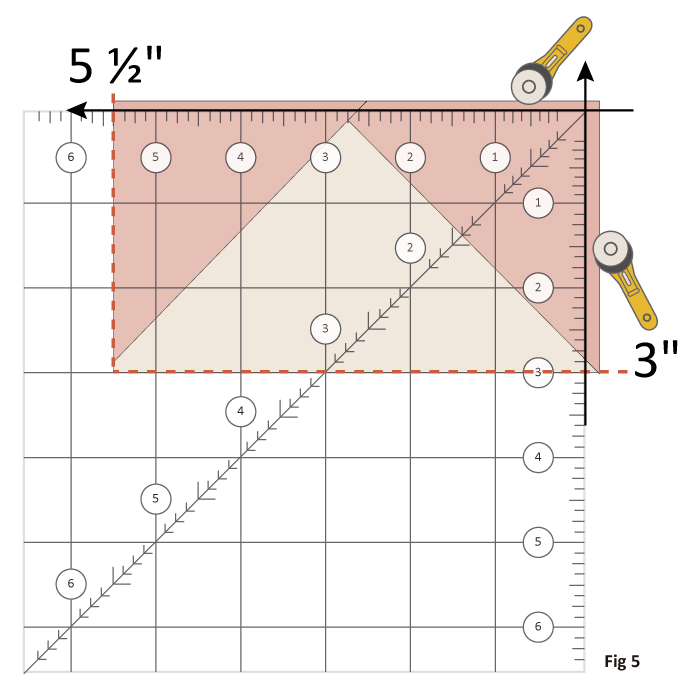
Rotate the unit 180 degrees to cut the other two sides.
Take that left straight edge and line it up at 5 1/2" vertical mark on the ruler (the unfinished width) and 3" (the unfinished height) horizontal mark on the ruler - marked with red dashed lines (Fig 5).
Cut the right and top sides of the unit and you're done! You have a beautiful Flying Geese block ready to sew into your quilt blocks.
I hope you enjoy this new tutorial. I have to confess that I love trimming my Flying Geese since I discovered this method. They always turn out beautiful and perfect!
Thanks for reading,
Alexandra Bordallo
Comments ()